Friday, April 29, 2011
Fresh Start...Fresh Blog
So, ever since I started blogging, I felt like the design I chose didn't really fit me. I want my blog to reflect my personality and I felt like the other style didn't quite do it. So I decided to make a little change. I hope you like it :)
Thursday, April 28, 2011
Homemade Hummus: Flavored Your Way

I have to say I am kind of in love with hummus. It's the perfect lunch for me because I have a cute little baby Tupperware that I can just throw in my bag and walk out the door with. I make a batch over the weekend and have it for the entire week. This makes packing a lunch easy and I don't make random lunch purchases because I didn't have enough time the night before to make quinoa or a sandwich. It's also incredibly affordable! I mean, my one jar of Tahini ($6) has allowed me to make at least 6 batches of hummus and I have probably 4 more to go. What else you put in your hummus is your business, so be creative!
The first time I made hummus it tasted great, but I couldn't get over the texture. No matter how much I pulsed that thing, it still had tiny chunks. Then I read this post from Eating Bird Food. It changed my life...and my hummus. Thank you!!!
The trick to silky smooth hummus is peeling the chickpeas. It honestly doesn't take that long - I just do it while I am watching TV or something since I can never sit still anyway. Boil a pot of water, add the peas, cook for about 3 minutes, drain, and the shells should pop off easily.
The second trick to smooth hummus is to add enough water. Start with the amount I list below and add more about 1 Tbs at a time until it's as smooth as you want. It will harden up over time, too, so keep that in mind.
Yummy Hummus! (courtesy of the Whole Foods app and my little grey cells)
One can of chickpeas = 1 batch for me
Boil and shell one can chickpeas as directed above.
Put into a food processor (I have a mini-one) or any device of the like.
Add 1/4 cup water, 2 Tbs olive oil, 2 Tbs Tahini, salt and pepper to taste, 1 tsp lemon juice, a sprinkle of paprika, and a dash of Cayenne if you like some heat.
Pulse until smooth.
Taste and season accordingly.
Store for about a week - you can spritz with lemon before serving, or add some parsley.
Tastes great with carrot spears and pretzels!

Tuesday, April 26, 2011
Spaghetti with a Twist

A while back my roommate made her spaghetti sauce the "Ghanian way" and I was amazed at how a few modifications really made the meal. I tried my own version the other night and it was fabulous. Turkey is a wonderful thing, I must say: leaner and more tender in my opinion. than ground beef.
First saute about one small onion, finely chopped. Then add 1 pound of ground turkey and cook until the turkey is almost cooked through. I don't mush the turkey into tiny pieces: some people are really particular about having the same consistency for their sauce, but I personally keep the chunks different sizes because I find the larger ones to be more tender...
In a saucepan add 1 jar of your favorite tomato sauce, seasoned with pepper, garlic powder, and Cayenne pepper.
Add the turkey/onions and cook for about 20 minutes on low heat.
Make your pasta and serve -this keeps for about a week in the fridge, too!
Thursday, April 21, 2011
Roasted Carrots with Lemon
 Thanks to my Martha Stewart Living magazine for the following recipe - these were the perfect way to spend the afternoon: biochemistry in one had, fork in the other. And sooo pretty! Roasting veggies is the new "thing" and I am totally on board.
Roasted Carrots:
Peel as many carrots as you want to cook and cut them lengthwise and then in half -so you have little shelves of carrots. Don't leave them round or cut on the bias, in other words, because you want a lot of surface area for the sugars to caramelize.
Throw onto a baking sheet, drizzle with olive oil, salt, pepper and put them in a 425 degree oven for 20-25 minutes. Mine got really crispy on the bottom but I liked it that way: if you prefer a more even roast, you can turn them halfway through.
When they are done, spritz with lemon before serving.
Wednesday, April 20, 2011
A Very Good Thing
Well, today I have been walking on air because yesterday I got the best news EVER: I got into dental school here at VCU!!!
If you know me, you know how long I've wanted to be a dentist - although even Weston was surprised when he found out that I was planning my curriculum in middle school based on what would look best on my dental app.
The last year has been really, really hard on my mom, siblings, and myself. Honestly, this was the best news we could ever hope for. It took me moving all the way to RVA, but it was for a reason.
To celebrate, since I don't have a car, I turned my leftover risotto into crusty little tasties by rolling bits in breadcrumbs and serving with a homemade spicy marinara sauce: recipe to follow!
Tuesday, April 19, 2011
Even Foodies Get Scared

In 2009 I was lucky enough to study abroad in Italy. There I learned what risotto is supposed to taste like: creamy, al dente, savory and flavorful. In the States, I'd never had a good plate of it, so it's no wonder I thought I didn't like it. Well, after having the proper risotto, I was scared I'd never be able to match the wonderful consistency. So for the past 2 years I have relished in the memory of a truly amazing risotto but never ordered any nor tried my hand at recreating it. Until now.
I have to say, blogging has made me more confident in my abilities in the kitchen. The idea to finally make risotto was born about 2 months ago. I slowly took baby steps towards the event: I bought a bag of arborio rice 1 month ago, a week later I received my Martha Stewart Everyday Risotto recipe (it was fate), and then, during my last trip to the store I picked up the rest of the ingredients.

I made some substitutions to the recipe because I thought the flavors would work well together. The key to risotto, I learned, is really understanding your star ingredient: the rice. I tried it at various stages to know what it tastes like when in was undercooked vs. al dente. And I was patient, coaxing the starches out and adding flavor. The substitution of pecorino for Parmesan was a great idea since it gave the dish an extra punch of flavor.

What you need:
1 container button or whatever mushroom you like, quartered
1 onion, chopped small
2 cloves garlic, chopped small
salt, pepper
1/4 cup cooking sherry or 1/2 cup white wine
1/2 tsp dried sage (tarragon would be good, too)
6 cups chicken stock (or 5 cups plus a cup of water if you want to stretch it, like I did)
1 package (1 and a half cups) arborio rice
4 Tbs butter, divided
pecorino
What you do:
Start the stock heating in a saucepan - let it come to a simmer and keep warm throughout the cooking process.
Melt 2 Tbs of butter in a heavy-bottom pot. Add the onions and cook until translucent. Add the mushrooms and cook until wilted slightly. Add the rice and cook about 3 minutes, until the grains are opaque on the edges. I just let them toast and turn a light brown color. Once I felt them sticking to the bottom of the pot, I added 1/4 cup cooking sherry and the sage. That cooked out in about 4 minutes, then I added my first cup of stock.

Stir for about 4 minutes, until the cup of stock had cooked out. Add the next cup and continue about 6 more times, letting it cook out each time. I set a time next to me so I knew I was waiting the correct amount of time and not getting antsy. I also tasted after the 5th time so I could tell how far along the rice was.

When it's the right consistency (creamy but a tad tough in the middle of the rice), turn off the heat and add 2 more Tbs butter and 1/4 cup freshly grated pecorino
Serve immediately with a little more shaved pecorino. I wouldn't recommend storing this but you can - it will just be a little drier and not as creamy.

All in all, I am incredibly proud of myself. But I owe the experience to you, my readers, because with each view, I am little more confident that I have the skills to master the things I am afraid of.
Friday, April 15, 2011
Revisiting Quinoa

Wondering what to do with that box of quinoa you bought to make my last recipe? Well, here's a super simple, yet hearty recipe that's sure to energize you...AND you can make it in about 20 minutes!
What you need (this makes about 2 servings)
1 cup chicken (or vegetable stock)
1/4 of a small red cabbage, sliced/chopped
2/3 cup soybeans
1/2 cup quinoa
salt, pepper, olive oil, balsamic vinegar, garlic powder
What to do:
Prepare the quinoa by mixing the dry quinoa and stock in a saucepan. Let come to a boil, lower the heat and cover for 15 minutes, until the quinoa is tender.
Add the soybeans and cabbage.
Dress with a drizzle of olive oil, salt, red pepper flakes, and garlic in some form (I use chopped and dry) and about 1 Tb vinegar - it will soak right in so add more if necessary. I used a pomegranate balsamic vinegar and it was absolutely divine, so experiment with any crazy flavors you have hanging around...you know one of your friends gave you a bottle as a gift some number of birthdays ago.
Tuesday, April 12, 2011
Do you remember Mr. Hercule Poirot?
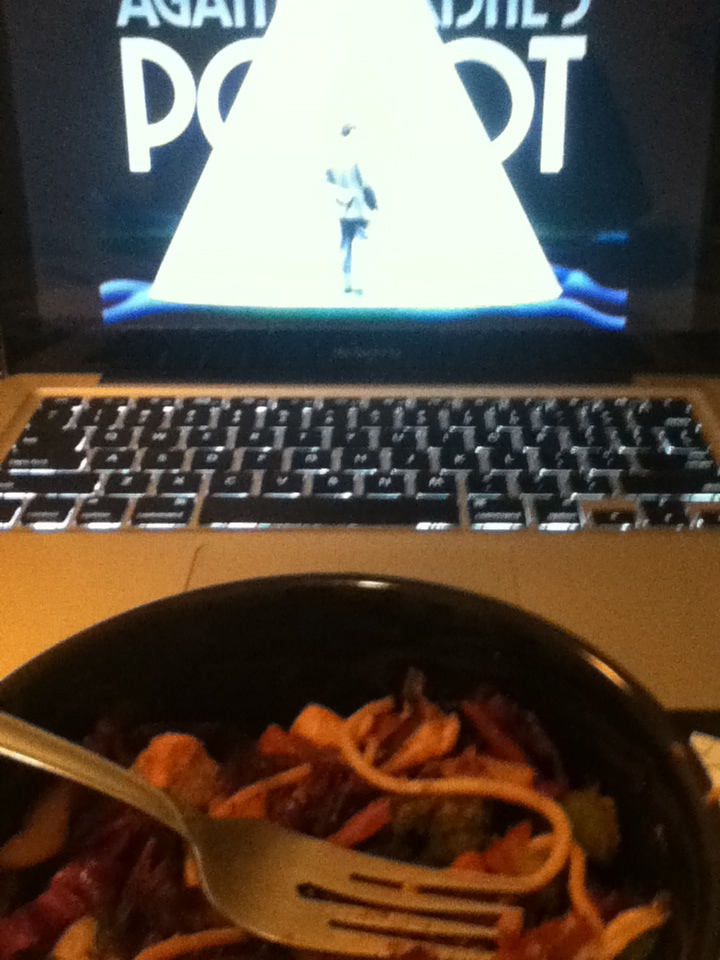
My mom is kind of obsessed with Poirot - you know, that famous Belgian detective with the awesome mustache? Her kids know this and we all use it as a ploy when we want her to stop stressing about "her papers" and sit down with us and relax. It's actually a good show/series and I find myself missing it when I'm alone with no cable and I've watched all my shows on hulu. So over Spring Break I snagged a few of her doubles and brought them back to Richmond.
I was in the mood for stir-fry but not the greasy take-out kind, so I decided to make my own. The creation was really yummy, and I was proud of the way I was able to salvage some things I thought had been transformed by the freezer-burn fairy.
What you need:
1 bag of Trader Joe Veggie Harvest (mushrooms, baby corn, carrots, broccoli, water chestnuts)
6 pieces of Trader Joe ice-glazed chicken tenders
3/4 red cabbage, sliced
1/2 package soybeans
2 cloves diced garlic
red pepper flakes, salt, pepper, garlic powder
soy sauce
peanut butter - the chunky kind
lo mien noodles
What you do:
Get your water boiling!!! I always forget this and am left waiting on the noodles.
Season your chicken however you like (don't forget a little olive oil) and bake at 350 degrees for about 20 minutes - thaw it first, if using right out of the freezer.
Throw the noodles in the water - they should be done in about 8 minutes
In the meantime, make the veggies by frying the Trader Joe veggies in a little grapeseed oil until they are cooked warm. Add the garlic and cabbage and fry until the cabbage is just wilted, but hasn't lost it's purple. Add the cooked soybeans and set aside.
Now, I am only feeding one person, but I make enough for the whole week. By making the veggies separate from the noodles, separate from the chicken, I can assure nothing gets nasty-wilty and discolored. It's like each meal is fresh since I have to season it each day, too.
So, to assemble: in a saucepan, add the amount of veggies you want, some chopped chicken and the noodles. Add your seasonings - a spritz of lemon never hurt anyone if you have that onhand, a drizzle of soy sauce, and about a teaspoon of peanut butter. Stir over medium low heat for about 3 minutes - it's all cooked and hot anyway. Serve immediately.
This is the perfect meal because you can do all the hard work ahead of time. I purposely bake the chicken because I find it is nice a moist without adding too much extra oil - AND you don't have to worry about an extra dish or flipping every 3 minutes.

Sunday, April 10, 2011
This One's for the Marylanders

This past week I got a package from Weston - notes for Biochem, a couple of shirts, and these babies. Nummy nummy Berger cookies. The first thing that struck me was that I'd been spelling them wrong this whole time...they aren't bUrger cookies, even though they looks kinda them 'em, right? Actually, I was completely off because they are named for the guy who invented them...
Second, they were heavy! Half chocolate creme/ganache and half white cookie. They are so sweeeet - it kind of turned me off at first, but before I knew it I was craving these tasty treats every moment. I've had to cut back to only one a day ;)
Here's a little tidbit about Berger cookies if you're interested, but truth be told, you must try them for yourself whenever you find yourself in the Land of the Terps.

Oh, did I mention...they're sold by the pound!

Thursday, April 7, 2011
Home Cooking = Mom's Persian Chicken with Yogurt, Raisins, and Almonds
 Usually when I go home dinner it something we come up with at the last minute. Don't get me wrong, it's always tasty, but it's still some sort of creation we make with leftovers. When I went home for spring break though, my mother told me she was going to make my favorite Persian chicken dish - and boy did she deliver...
Why do I love this meal so much? Because it is a) easy b) inexpensive and c) full of flavor
We used to use chicken legs, but my mom has switched over the thighs. A little dark meat never hurt anyone; feel free to use chicken breasts if you want, but it probably won't be as juicy.
Fry off one sliced onion until it is golden.
Sear the thighs in a skillet with turmeric, pepper, salt, and cardamom, cinnamon, and a little cumin. Add the onions and set aside.
Fry the almonds and raisins. Set aside.
Combine 1/2 cup plain Greek yogurt and 1 cup sour cream with a pinch of salt. Taste to be sure the sour cream flavor is more prevalent and add more accordingly if you have to. Set aside.
Place the chicken mixture in a Pyrex dish and pour in about a cup or a half cup of boiling water. This creates a juice for the chicken to cook in. Cover with the sour cream mixture. Cover with aluminum foil and bake at 300 for about 15-20 minutes. The chicken is essentially already cooked, so you just want to give everything time for the flavors to meld together. Take out and put the almonds and raisins over it, along with another fried onion - this time fry it till it is pretty dark.
Serve over rice!!!

*Note: this is the chicken component to a Persian dish called Shirin Polo, or sweet rice. It is traditionally served at happy occasions, like weddings. You serve the chicken alongside rice that you have covered with sweet carrots and more fried almonds (or pistachios) and raisins. To make the carrots, fry about 1 bag of pre-julienned carrots in grapeseed oil. Add salt and 1/4 tsp cardamom and 1/2 tsp cinnamon. And continue frying till the carrots have just a little crunch left. Put this over the rice, then add the nuts and raisins.
Tuesday, April 5, 2011
Hey Puddin'

The other day I had a dream that I made rice pudding... I woke up with a terrible craving for it and in a haze I had a most brilliant idea to use the Silk Coconut Milk I had purchased for my smoothies. The milk overpowered the flavor of the fruits, so I was getting a bit tired of having flat-palate drinks; using the coconut milk in lieu of whole milk or even skim seemed like the PERFECT substitution for a rice pudding. Aaaand I did have a lot of basmati rice in the cupboard. So I threw off the covers and plopped myself in front of the computer, froggy pjs and all, in search of a recipe. I just wanted a plain and simple recipe since I'd never made rice pudding before and I wanted to invent my own flavors by steeping the pudding with a few cardamon pods.
My recipe is loosely based off this one from Ina Garten. Although right now, I must say I am not happy with her after turning down the Make-A-Wish child's desire to cook with her not once, but twice. I mean, it looks pretty bad, Ina, no matter how you slice it...
Now, don't be intimidated by the thought of making your own rice pudding. It really is quite simple, but you need to be sure to cook the rice through before taking it off the heat, because once it's in the fridge, it really won't get any - um - mushier.
Creamy Coconut Rice Pudding
What you need:
3/4 c basmati rice
1/2 tsp salt
5 cups vanilla coconut milk - in the half gallon carton, not the canned stuff - that's wayyy too fatty and expensive
1/3 c sugar
1 egg, lightly beaten (this is optional)
1 1/2 tsp vanilla
5 cardamom pods
What you do:
Combine the rice, salt, and 1 1/2 cups of the milk in a saucepan and bring to a boil. Stir once, then lower the heat to a simmer, cover the pot, and cook on the lowest heat for 8-9 minutes. Don't open the lid - the rice is steeeeeaming :) If you have a hot stove, keep the pan halfway off the heat because you don't want the bottom to scorch.

Take off the lid and add 3 more cups of coconut milk, sugar, and cardamom pods. Taste to see if it needs more sugar, but using vanilla coconut milk helps reduce the normal amount in most rice puddings.

Simmer, uncovered for 30-35 minutes -until the rice is tender to the bite. Towards the end of the time, the pudding will thicken a lot so stir often. Add the vanilla. This is when Ina says to add the egg, but you could skip this step. I did it but tempered the egg first in a bit of the pudding - still, tiny specks of cooked egg formed. They didn't bother me, and I think the egg helped tighten up the pudding, but I like mine loose so I could have done without it.

Take off the heat and serve warm, or put in the fridge for later. Take the pods out before storing, though, otherwise they overpower the pudding and it can taste a little "off.

Friday, April 1, 2011
Special Thanks To A Special Friend
I'm always blogging about the goodies I make to bring to others, but today somebody brought something yummy to ME! How special do I feel?
So, thank you Rini for the delicious oatmeal cookies - they were so moist and chewy! I could barely wait to get home before munching on them with a nice cold glass of milk :)
~Sheila
Subscribe to:
Posts (Atom)